
We all have that one aging laptop sitting in a drawer—maybe an old Acer Aspire or a Dell Inspiron from 2018 that’s too slow for Windows 11 but too good to throw away. In Malaysia, where hardware prices are climbing, repurposing old tech is a smart move.
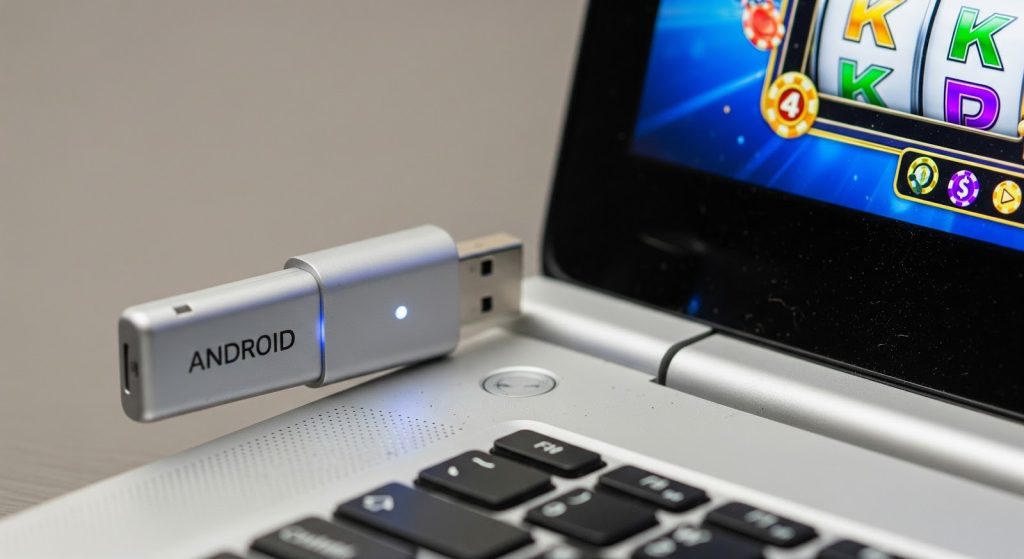
Instead of letting it collect dust, you can use WinSetupFromUSB to turn that flash drive into a bootable “Android Gaming Stick.” This allows you to boot a full mobile operating system (like Bliss OS or Android-x86) directly from USB, bypassing the heavy Windows drive entirely.
Here is how to set up a dedicated, lightweight gaming environment to run popular APKs on hardware that shouldn’t be able to handle them.
1. Preparation: What You Need
- A USB Drive: At least 8GB (USB 3.0 recommended for speed).
- The ISO: Download a stable build of Bliss OS (recommended for newer PCs) or Android-x86 (better for older BIOS legacy machines).
- The Tool: Obviously, we are using WinSetupFromUSB.
2. Burning the ISO
- Plug in your USB and launch WinSetupFromUSB.
- Check the box for “Auto-format it with FBinst” and select FAT32 (crucial for UEFI boot compatibility).
- Under the “Linux ISO/Other Grub4dos compatible ISO” section, browse and select your Android ISO file.
- Click GO and wait for the process to finish.
3. Booting & BIOS Settings
Plug the USB into your target laptop. Reboot and hammer the Boot Menu key (usually F12 or F9).
- Tip: If you see a “Secure Boot” error, you must go into BIOS and disable Secure Boot. For older Malaysian government-issue laptops (like the 1Malaysia netbooks), you might need to enable “Legacy Support” or CSM.
4. Setting Up the Environment
Once you boot into “Live Mode” (without installing to the hard drive), you will land on a standard Android desktop. The first thing you’ll notice is how fast it is—Android uses a fraction of the RAM that Windows does.
Now, you need to populate it with software.
Since this is a custom environment, Google Play Services can sometimes be buggy or crash on specific Wi-Fi drivers. The most reliable method is sideloading. Open the built-in Chrome browser and head to your source. For example, if you are setting this up as a gaming rig, you can grab the package for your preferred game.
When installing the app (such as the 64-bit version of Mega888 or other lightweight APKs), the system will ask for “Install from Unknown Sources” permission just like a phone. Grant it.
5. Why This is Better Than Emulators
You might ask, “Why not just use BlueStacks?” Simple: Overhead. Emulators run Android on top of Windows. That requires massive resources. By booting from USB, you are running Android on the bare metal. This means simpler 2D games run at a silky smooth 60FPS with zero input lag, even on a laptop with only 4GB of RAM.
6. Troubleshooting Input Issues
If your touch-pad doesn’t work, plug in a USB mouse. Android-x86 has native support for almost all standard USB peripherals.
Verdict
This project is the perfect weekend experiment. It keeps your main Windows OS clean while giving you a dedicated, portable stick for your mobile gaming needs. Just plug it in, boot up, and you’re ready to grind.